Intro
Christmas Eve is the perfect moment to showcase festive nail art that sparkles, shines, and complements your holiday outfit. Whether you’re headed to a cozy family dinner, a glam party, or a quiet night in by the tree, the right manicure can elevate your look. Below are 20 unique Christmas Eve nails ideas that cover red, green, gold, silver, and icy blue palettes, along with easy-to-follow steps, tools, and variations. Use these ideas as a jumping-off point to craft a manicure that screams holiday cheer and is walk-ready for all your celebrations.
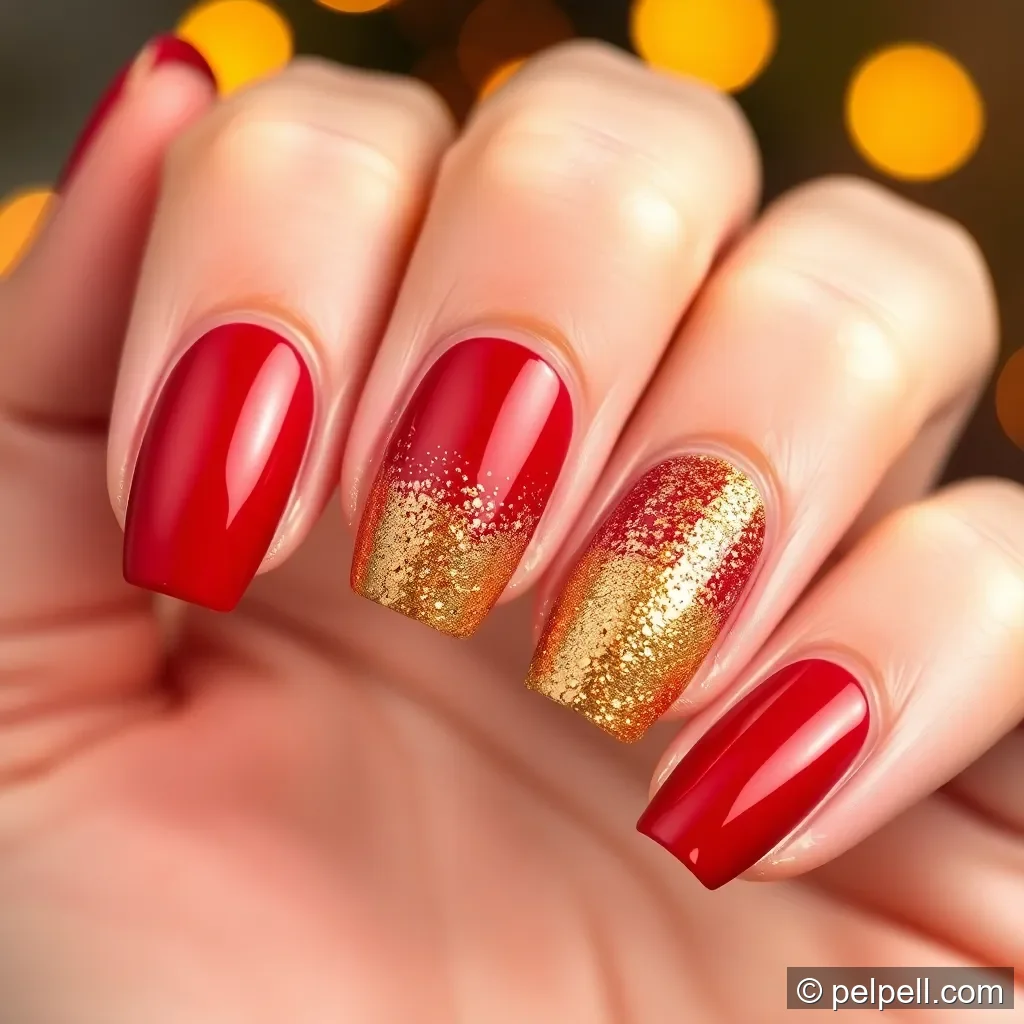
Design 1: Classic Red with Gold Glitter Accent Nail

Overview: A timeless red base with one glamorous accent nail featuring gold glitter.
Materials needed:
– Red nail polish (creme finish)
– Gold glitter polish or loose glitter
– Clear top coat
– Base coat
– Nail art brush or dotting tool
Steps:
1) Prep nails and apply base coat.
2) Paint two coats of red on all nails.
3) On the ring finger, apply clear polish and press gold glitter to create a diagonal glitter nail.
4) Seal with a glossy top coat.
Variations:
– Use holo gold for extra sparkle.
– Try a matte top coat for a sophisticated finish.
Why it’s festive: Red and gold are holiday staples and read as “Christmas Eve” in an instant.
Design 2: Emerald Green with Gold Foil
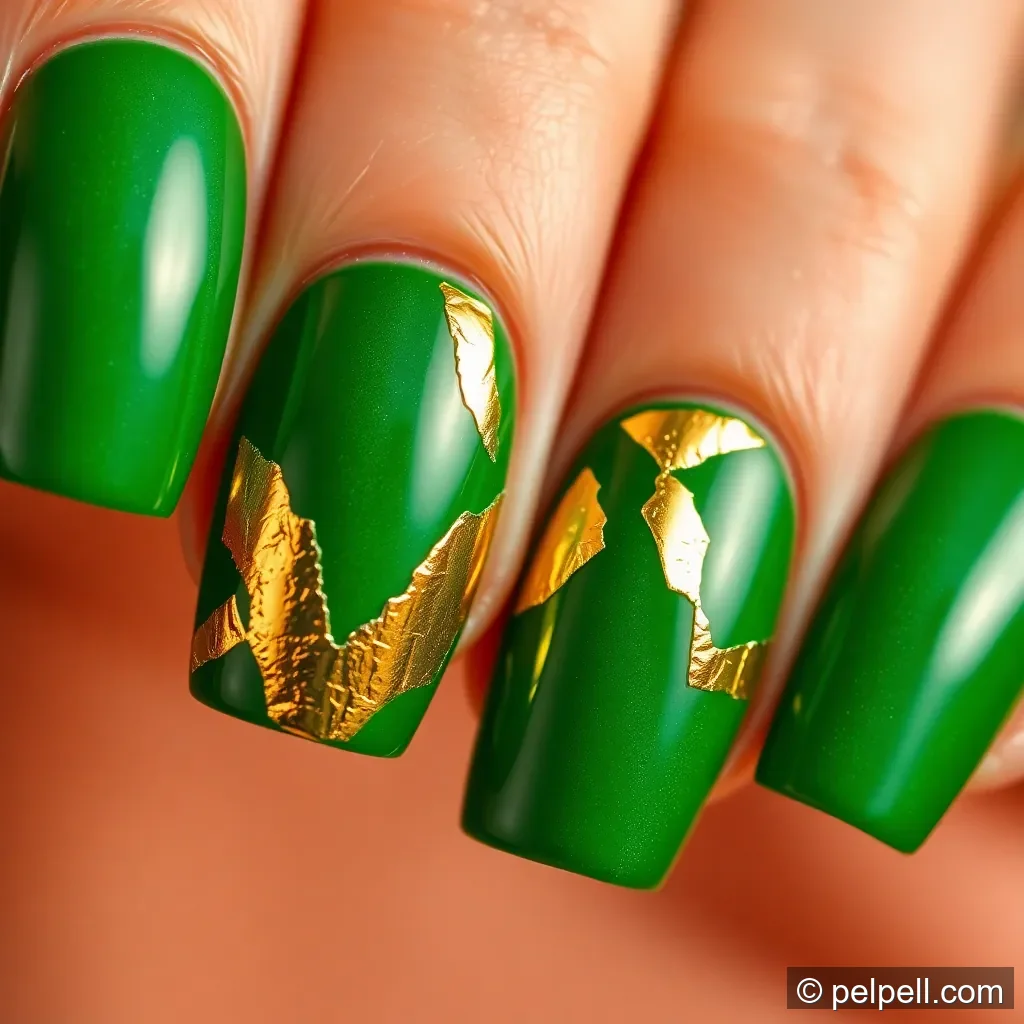
Overview: Deep emeralds paired with shards of gold foil for a luxe look.
Materials needed:
– Emerald green polish
– Gold foil sheets or flakes
– Clear top coat
– Tweezers
Steps:
1) Prep and base coat.
2) Apply two coats of emerald green.
3) Tear mini gold foil pieces and place them on a few nails (or all) with tweezers.
4) Press gently and seal with top coat.
Variations:
– Mix green tones (forest + emerald) for depth.
– Add a thin black line around foil pieces for definition.
Why it’s festive: Gold on green channels classic holiday elegance.
Design 3: Snowy White with Snowflake Stamp

Overview: A crisp white canvas with delicate snowflakes stamped onto the nails.
Materials needed:
– White creme polish
– Snowflake stamping plate
– Black or silver stamping polish
– Clear top coat
Steps:
1) Apply base coat and white polish (two coats).
2) Stamp snowflakes on selected nails (or all).
3) Add a subtle silver or white accent if desired.
4) Top coat to seal.
Variations:
– Use pale blue stamping polish for a chilly look.
– Add a glitter top coat on one snowy nail.
Why it’s festive: Snowflakes feel perfectly wintry and Christmas Eve appropriate.
Design 4: Candy Cane Stripes

Overview: Red and white stripes patterned like candy canes.
Materials needed:
– Red and white nail polish
– Striping tape or nail art brush
– Top coat
Steps:
1) Base with white or red (your choice).
2) Place thin striping tape to create stripes, then paint top color.
3) Remove tape to reveal clean candy cane lines.
4) Seal with top coat.
Variations:
– Alternate red and white on every nail.
– Create an accent nail with full candy cane stripes.
Why it’s festive: The iconic candy cane pattern is instantly holiday-themed.
Design 5: Santa Hat Accent Nail

Overview: One accent nail painted as a tiny Santa hat.
Materials needed:
– Red, black, and white polish
– Dotting tool
– Top coat
Steps:
1) Paint base color red (all nails or just two coats on all).
2) On one nail, paint a black hat rim and a white faux fur trim with a dotting tool.
3) Finish with a white pom-pom at the tip.
4) Top coat.
Variations:
– Add a small white dot to mimic a snowflake on the hat.
Why it’s festive: A playful nod to Santa adds whimsy without overpowering the look.
Design 6: Gold Glitter Ombre on Red Base
Overview: A gradient of gold glitter fading on a red background.
Materials needed:
– Red polish
– Gold glitter polish or loose glitter
– Makeup sponge
– Top coat
Steps:
1) Base red on all nails.
2) Use a sponge to dab gold glitter toward the tips for an ombre effect.
3) Blend edges softly with a clean brush.
4) Top coat for shine.
Variations:
– Switch to silver glitter for a cooler winter vibe.
– Use a nude base for a subtler look.
Why it’s festive: Glitter gradients are a classic party-ready choice for Christmas Eve.
Design 7: Matte Burgundy with Gold Accent Line
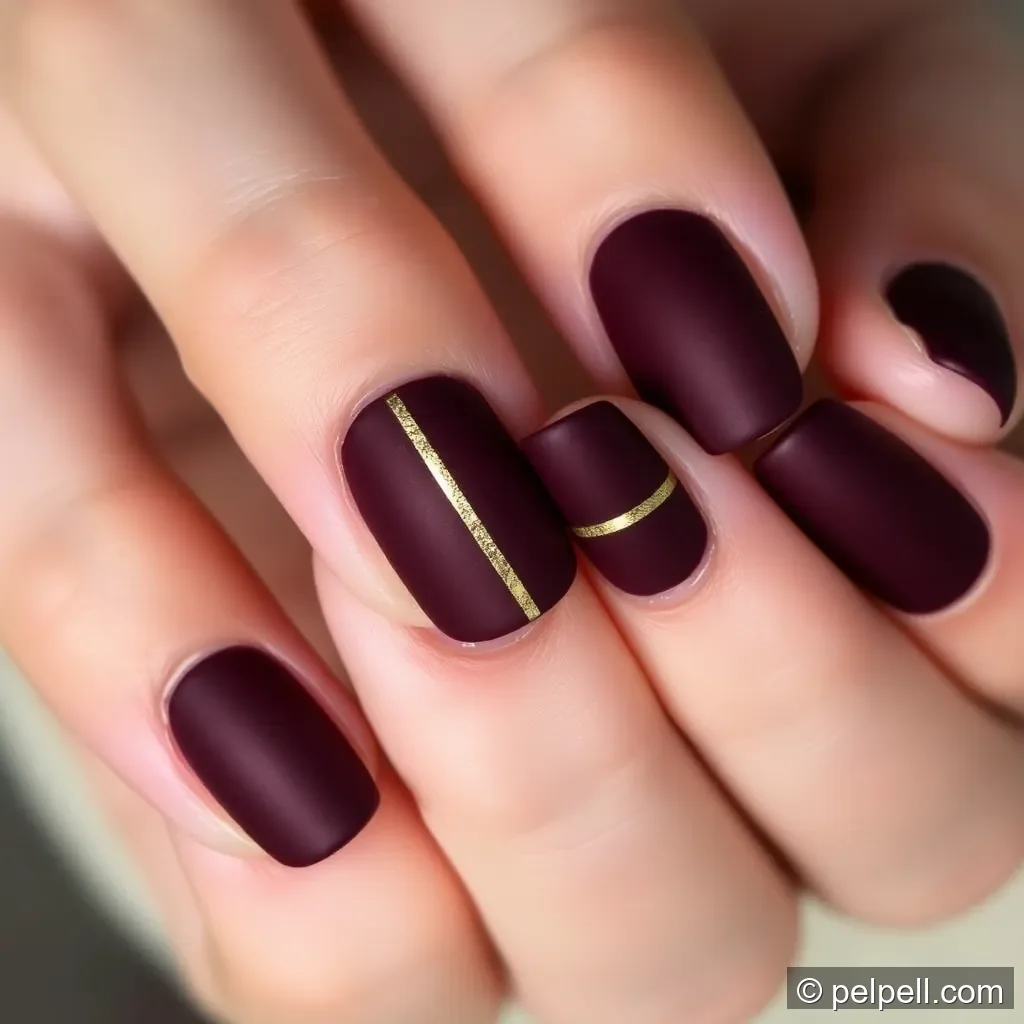
Overview: Rich burgundy nails with a sleek, metallic gold stripe.
Materials needed:
– Matte burgundy polish
– Gold striping tape
– Top coat (matte)
Steps:
1) Paint two coats of burgundy; allow to dry.
2) Apply a thin gold stripe using tape across one or more nails.
3) Finish with a matte top coat for a velvety look.
Variations:
– Replace burgundy with deep green for a different holiday feel.
– Add a tiny dot near the stripe for extra detail.
Why it’s festive: Matte textures feel luxe while still reading Christmas Eve chic.
Design 8: Plaid Holiday Nails

Overview: A plaid pattern inspired by cozy winter wear, perfect for Christmas Eve gatherings.
Materials needed:
– Red, green, black, and white polishes
– Thin nail art brushes
– Striping tape (optional)
Steps:
1) Base color on all nails (neutral or red/green).
2) Create crisscross plaid lines using thin brushes or tape.
3) Add tiny white dots or a green line for dimension.
4) Top coat.
Variations:
– Simplify to a single plaid accent nail.
Why it’s festive: Plaid nails instantly communicate holiday spirit.
Design 9: Marble Red and White with Green Veins
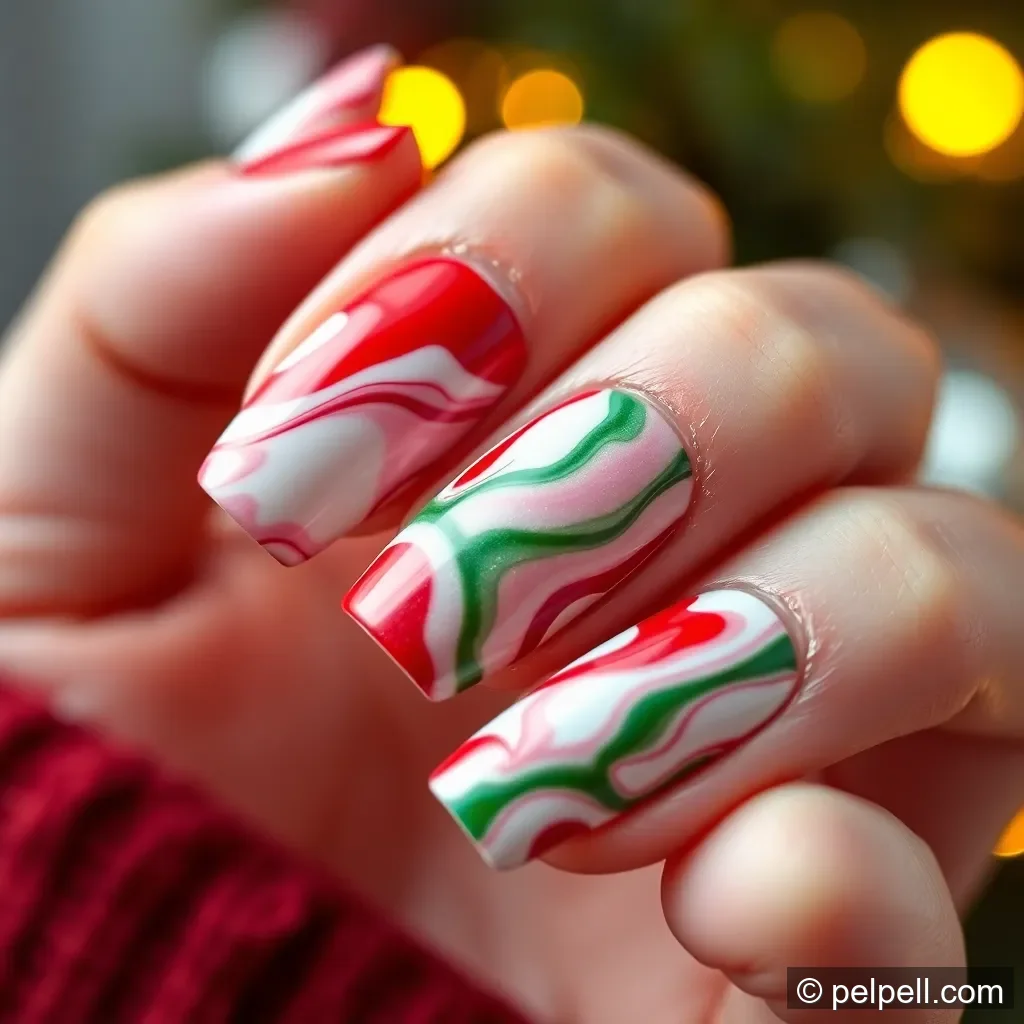
Overview: A Christmas-inspired marble mani with red and white swirls and subtle green veins.
Materials needed:
– Red, white, and mint/green nail polishes
– Nail art brush or needle
– Clear top coat
Steps:
1) Create a marble base by dabbing red and white on the nail.
2) Lightly draw green veins for contrast.
3) Seal with top coat.
Variations:
– Use a nude base for a softer look.
– Add a tiny gold speck on the union point for sparkle.
Why it’s festive: Marble is chic enough for a refined Christmas Eve look.
Design 10: Matte Burgundy with Gold Stars
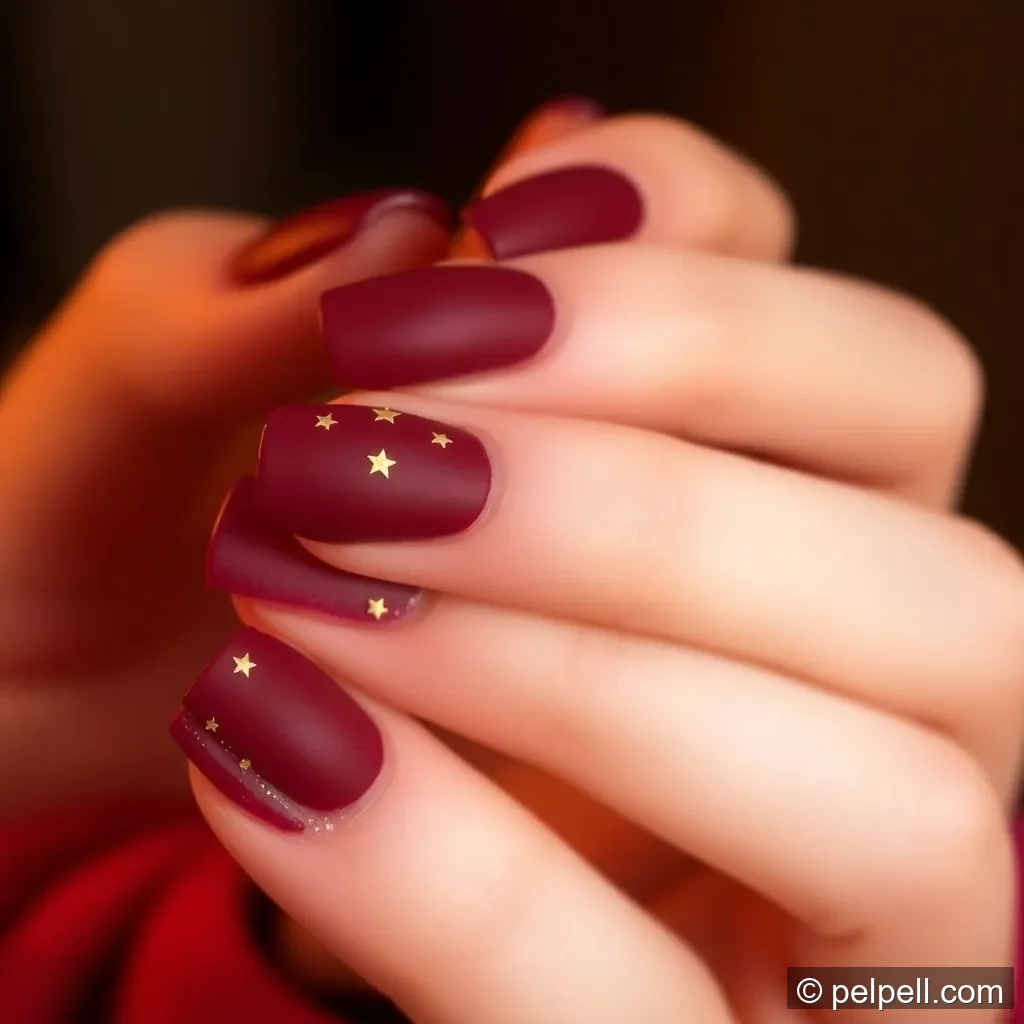
Overview: Burgundy nails with tiny gold star decals or hand-painted stars.
Materials needed:
– Matte burgundy polish
– Gold star decals or fine brush for stars
– Top coat
Steps:
1) Apply two coats of matte burgundy.
2) Place or paint tiny gold stars on one or two nails.
3) Seal with top coat.
Variations:
– Combine with a glitter accent nail on the ring finger.
Why it’s festive: Subtle, starry accents feel magical for holiday evenings.
Design 11: Night Sky Navy with Snowflakes

Overview: Deep navy nails with white snowflakes for a night-time Christmas Eve vibe.
Materials needed:
– Navy blue polish
– White stamping or dotting polish
– Snowflake stamp or freehand brush
Steps:
1) Paint nails navy.
2) Stamp or draw white snowflakes on selected nails.
3) Add a thin silver line along the tip if desired.
4) Top coat.
Variations:
– Add tiny silver dots for a meteor-like finish.
Why it’s festive: The winter night aesthetic fits Christmas Eve celebrations beautifully.
Design 12: Holly Leaves and Berries Accent Nail
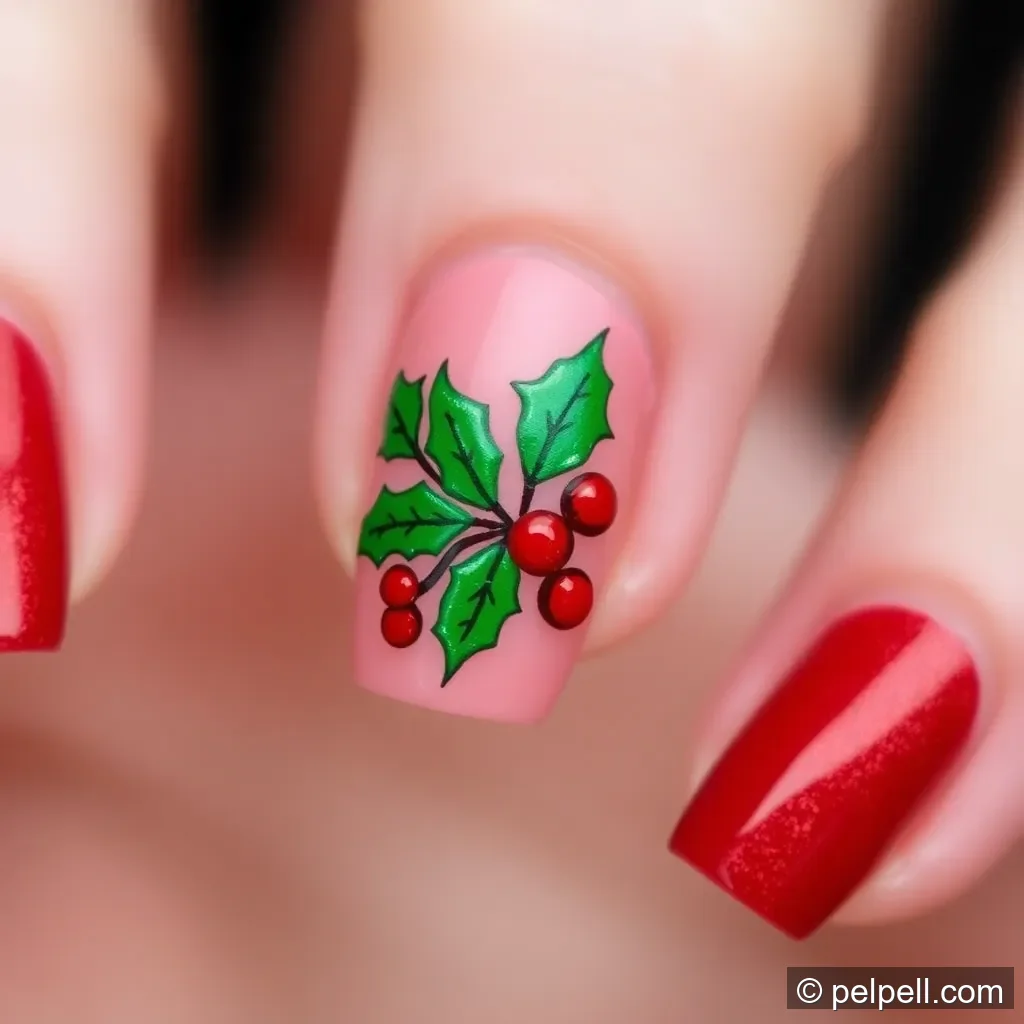
Overview: A classic holiday motif with green holly leaves and red berries.
Materials needed:
– Red, green, and black polishes
– Fine brush or stamping plate
– Top coat
Steps:
1) Base coat with neutral or pale red.
2) Paint holly leaves and berries on the accent nail (or use decals).
3) Outline leaves with thin black line for definition if desired.
4) Top coat.
Variations:
– Use subtle glitter on the accent nail for extra sparkle.
Why it’s festive: Holly is a timeless Christmas motif that reads instantly as festive.
Design 13: Peppermint Candy Swirl

Overview: Red and white swirl nails reminiscent of peppermint candy.
Materials needed:
– Red and white polishes
– Thin nail art brush or striping tape
– Top coat
Steps:
1) Base color of choice (white or red).
2) Create spiral swirls on selected nails with alternating colors.
3) Seal with top coat.
Variations:
– Add a silver glitter tip for extra holiday sparkle.
Why it’s festive: Mentions of peppermint evoke traditional Christmas treats.
Design 14: Gold Foil on Nude Base

Overview: Nude nails with shimmering gold foil accents for an understated luxe look.
Materials needed:
– Nude polish
– Gold foil sheets
– Clear top coat
– Tweezers
Steps:
1) Apply nude base (two coats).
2) Tear small foil pieces and place randomly on nails.
3) Top coat to smooth edges.
Variations:
– Use silver foil for a cooler palette.
– Add a subtle glitter top coat for extra shine.
Why it’s festive: A chic, minimal approach to Christmas Eve nail art.
Design 15: Red Nails with Tiny Pine Tree Decals

Overview: Red nails decorated with small pine tree decals or hand-drawn trees.
Materials needed:
– Red polish
– Pine tree decals or a small brush for trees
– Top coat
Steps:
1) Paint red base.
2) Apply pine tree decals or paint little trees.
3) Seal with top coat.
Variations:
– Alternate with a few green glitter studs to mimic forest decor.
Why it’s festive: Forest imagery aligns with Christmas themes without overwhelming the design.
Design 16: White Base with Red Tartan Plaid Accent Nail

Overview: A crisp white base with a red tartan plaid accent nail for a preppy holiday look.
Materials needed:
– White and red polish
– Black nail art brush or striping tape
– Top coat
Steps:
1) Paint nails white (two coats).
2) Create tartan plaid lines on one nail using red and black.
3) Top coat.
Variations:
– Swap white for a pale gray for a modern twist.
Why it’s festive: Tartan is a quintessential Christmas pattern that translates well on nails.
Design 17: Clear Base with Red and Green Glitter Tips

Overview: Clear or nude base with glittery tips in red and green for a playful vibe.
Materials needed:
– Clear or nude base polish
– Red and green glitter polish
– Top coat
Steps:
1) Apply clear or nude base.
2) Paint tips with red glitter on some nails and green glitter on others.
3) Finish with a clear top coat.
Variations:
– Use fine glitter for a more subtle sparkle.
Why it’s festive: Lightweight and fun for those who want a low-commitment holiday look.
Design 18: Icicle Tips in Blue and White
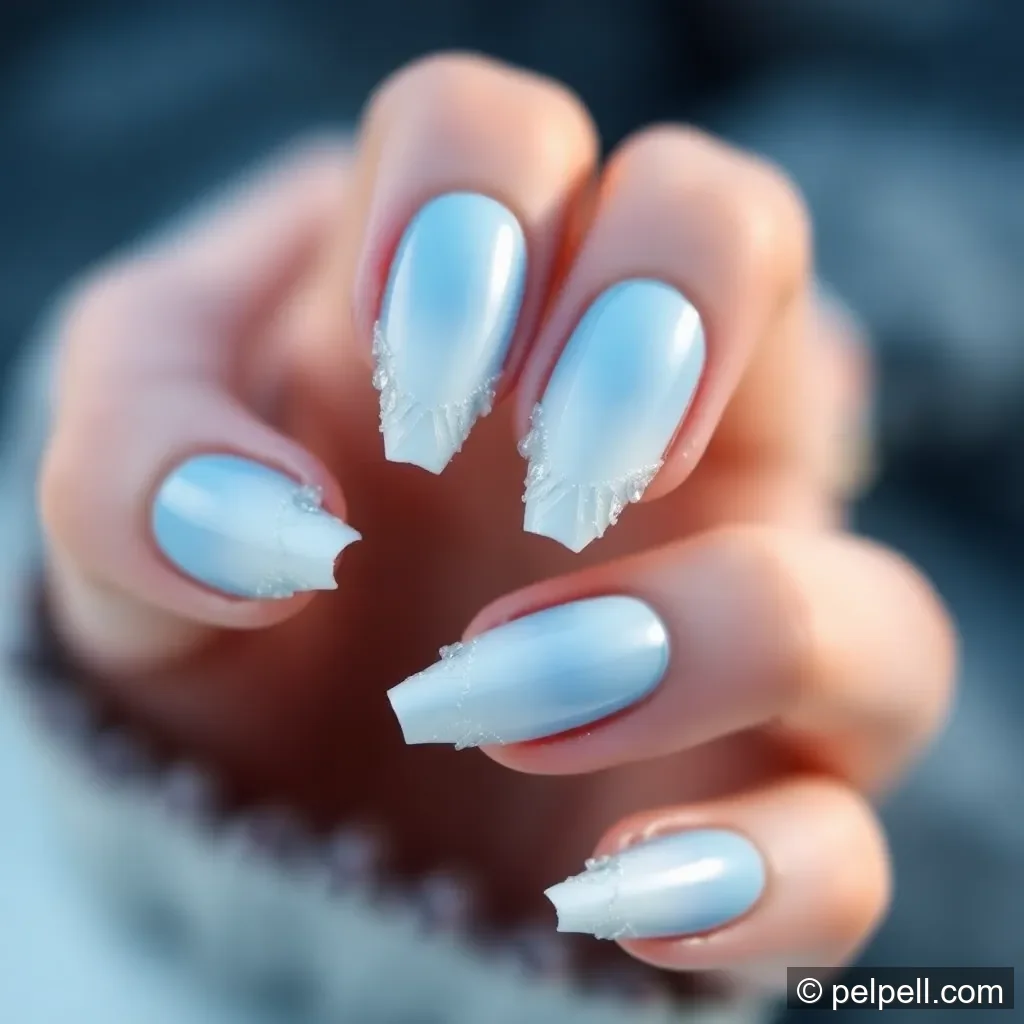
Overview: Pale blue and white gradient with jagged “icicle” tips for a chilly look.
Materials needed:
– Light blue and white polishes
– Thin brush or sponge for gradient
– Top coat
Steps:
1) Create a soft blue base.
2) Add white gradient near the tips to mimic ice.
3) Use a fine brush to draw icicle shapes along the edge.
4) Top coat.
Variations:
– Add a shimmer top coat for extra sparkle.
Why it’s festive: Icicles evoke the magic of winter nights and Christmas Eve atmosphere.
Design 19: Silver Glitter Gradient

Overview: A silver glitter gradient over a neutral base for a dazzling, airy finish.
Materials needed:
– Neutral base ( nude or light pink)
– Silver glitter polish
– Top coat
Steps:
1) Apply base color.
2) Dab silver glitter from the cuticle area toward the center to create a gradient.
3) Seal with top coat.
Variations:
– Use holographic silver for multidimensional shine.
Why it’s festive: Silver glitter nails are a versatile choice that pairs with many holiday outfits.
Design 20: Snow Globe Accent Nail

Overview: One accent nail designed to look like a tiny snow globe with decals or painted scene.
Materials needed:
– Neutral base on all nails
– Accent nail decals or paint (snow globe scene)
– Clear top coat
Steps:
1) Paint all nails with a neutral base.
2) On the accent nail, add a small snow globe scene (glitter, snowflakes, tiny trees).
3) Seal with top coat.
Variations:
– Use stickers or decals for simpler application.
– Add a tiny rhinestone to resemble a glistening ornament.
Why it’s festive: Snow globe nails are a playful, holiday-ready centerpiece for Christmas Eve.
Conclusion
With these 20 Christmas Eve nails ideas, you have a spectrum of styles—from classic red and gold to chic neutrals and whimsical scenes—to suit any holiday mood or party theme. Whether you prefer a bold statement nail or a subtle wintery touch, each design can be adapted to your skill level and available tools. Stock up on a few key supplies like a reliable base coat, top coats, and a mix of red, green, white, and gold polishes, and you’ll be ready to sparkle throughout Christmas Eve celebrations. Share your favorite design and tag your nail art photos with #ChristmasEveNails to inspire others and spread the festive cheer.