
Get ready for Christmas Eve with nails that sparkle, stay festive, and photograph beautifully in twinkling holiday lighting. This guide shows five detailed, easy-to-reproduce nail art ideas that fit every mood—from cozy and warm to playful and chic. Each design includes a simple materials list, clear steps, and tips to help you nail the look (pun intended) at home. If you’re planning a holiday manicure that lasts through gift-wurching family dinners and last-minute photos, these ideas are for you.
Design 1: Cozy Fireplace Glow

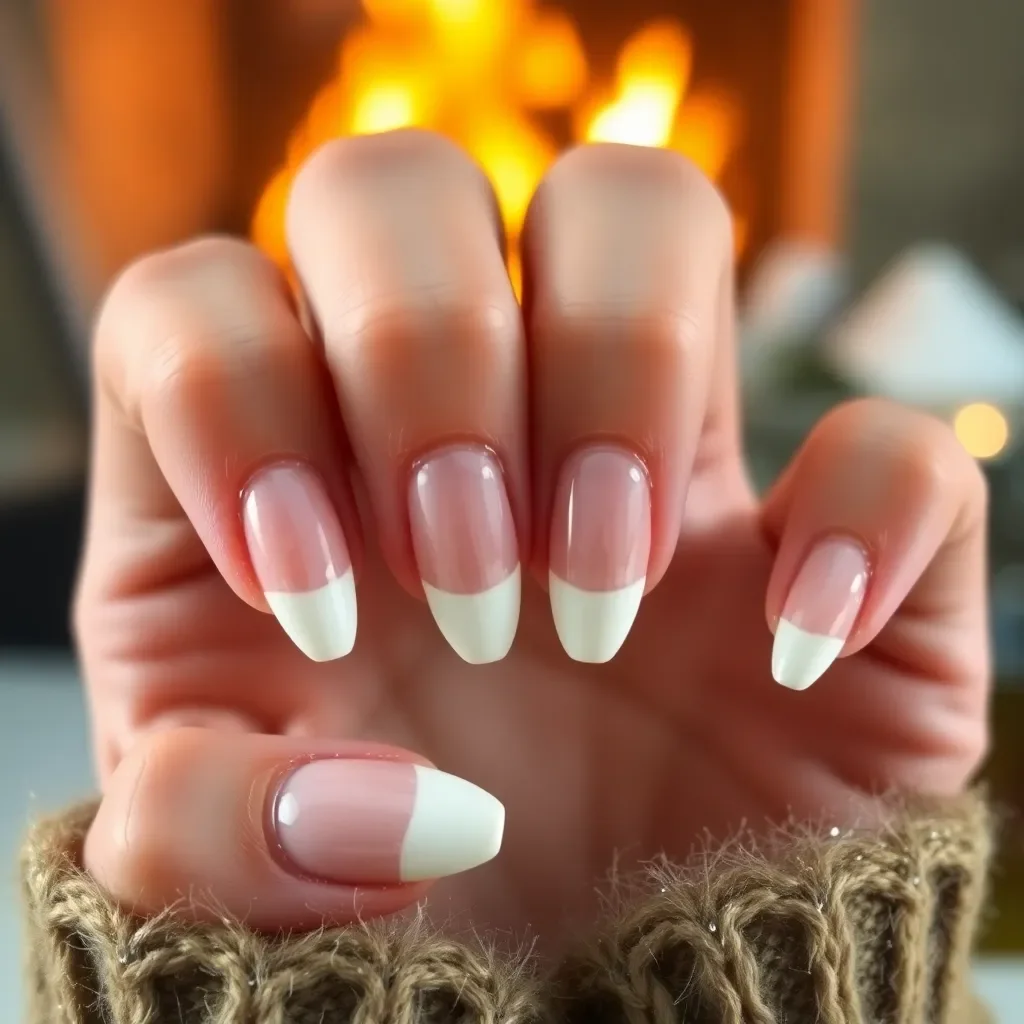
This look channels the warm glow of a crackling fire—soft neutrals with a touch of burgundy and gold to mimic flickering flames. It’s elegant, approachable, and perfect for a classic Christmas Eve mood.
- Colors & finishes: sheer nude or light pink base, cream, burgundy for tips, and a gold foil accent.
- Tools & extras: nail art brush, dotting tool, striping tape, gold foil sheets, top coat.
- Optional add-ons: tiny flame decals or a delicate gold glitter accent on one nail.
- Prep nails with a clean base and a base coat.
- Apply two coats of cream to all nails for a warm canvas.
- Paint the ring and middle nails with a thin burgundy French tip using striping tape for crisp edges.
- Adhere small gold foil pieces on the burgundy tips or near the cuticle for a subtle glow.
- Finish with a glossy top coat to lock in shine and prevent foil from lifting.
“A little gold foil goes a long way—like a warm ember catching the glow of a Christmas tree.”
Design 2: Winter Wonderland Snowflakes
Snowy blue nails with delicate white snowflakes evoke a crisp winter night. This design is timeless, photogenic, and surprisingly durable with a solid base color and careful detailing.
- Colors & finishes: icy blue, white, and a sprinkling of silver glitter on accent nails.
- Tools & extras: stamping plate or freehand snowflake brush, dotting tool, fine brush, top coat.
- Optional: a matte top coat for a frosted finish.
- Base with two coats of icy blue and seal with a thin layer of top coat.
- On one or two accent nails, stamp or hand-paint delicate snowflakes using white polish.
- Dust a light layer of silver glitter on the tip of the accent nails for a wintry sparkle.
- Finish with a clear top coat. If you prefer a matte look, swap in a matte top coat.
“Snowflakes are unique—no two nails should look the same, just like every Christmas Eve memory.”
Design 3: Santa’s Workshop Candy Cane

Red nails with white candy cane stripes bring a playful, festive vibe to your holiday look. This design is bold, fun, and easy to customize with more or fewer stripes depending on your nails’ length.
- Colors & finishes: bright red, white, and a touch of black for tiny detailing.
- Tools & extras: striping tape, thin nail art brush, dotting tool, clear top coat.
- Optional: tiny holly leaves or jingle bell decals on a couple nails.
- Base all nails with a smooth coat of red.
- Place two parallel white stripes on each nail using striping tape, then paint between the tapes and carefully remove the tape while wet.
- Use a thin brush or a tiny dot of black to add a minimal outline to stripes for definition.
- Add a small holly decal on a feature nail or two for extra holiday whimsy.
- Seal with a glossy top coat.
“Candy canes remind us that simple patterns can bring big smiles.”
Design 4: Midnight Green & Gold

A chic, upscale look that pairs a deep green with metallic gold accents. This design reads as festive and refined, ideal for a more formal Christmas Eve gathering.
- Colors & finishes: emerald or forest green base with gold detailing or stamping.
- Tools & extras: stamping plate or fine brush for geometric lines, gold foil or glitter, top coat.
- Optional: a single accent nail with a tiny gold foil shard cluster.
- Apply two coats of green to all nails and finish with a quick-dry top coat.
- Stamp or paint thin gold lines across each nail, experimenting with horizontal, vertical, or chevron patterns.
- For a luxe twist, press a small gold foil shard onto one accent nail before the top coat dries.
- Top with a high-gloss top coat to preserve the metallic shine.
“Green is the color of the evergreen season—the gold makes it glow like a tree lit at night.”
Design 5: Pine Cone French

A playful take on a classic French manicure, this version uses nude tips with tiny pine cone accents to celebrate winter forests and cozy evenings by the fireside.
- Colors & finishes: sheer nude base, white French tips, brown for pine cone detail.
- Tools & extras: thin brush, dotting tool, stamping plate or freehand pine cone design, top coat.
- Optional: a light dusting of fine glitter near the tips for extra frostiness.
- Finish all nails with a nude base and a clean, crisp French tip.
- Using a very fine brush, paint tiny pine cones along the edge of the tips or near the cuticle on select nails.
- Scatter a touch of sheer glitter near the tips if you want a frosted effect.
- Seal with a glossy top coat for a polished, long-lasting finish.
“A pine cone motif brings the forest indoors—cozy, natural, and perfectly festive.”
Conclusion

Five Christmas Eve nails, five different vibes, all designed to be achievable at home with common tools and a bit of patience. The key is to choose a base that feels like your mood for the night—cozy, magical, playful, chic, or evergreen-inspired—and to use accent nails to tell the story. With these ideas, you can rotate looks for any Christmas Eve moment—from intimate family dinners to late-night photo shoots under twinkling lights.
If you try any of these designs, share your results and tips. Tag your photos with #ChristmasEveNails and tell us which design was your favorite. Happy holidays, and may your nails sparkle as brightly as your holiday memories.