Introduction

Christmas Eve nails are the perfect finishing touch to your holiday look—glitter, plaid, snowflakes, and bold reds and greens that feel festive without screaming “costume party.” If you’re searching for easy-to-replicate ideas that look professional yet doable at home, you’ve landed in the right place. This guide dives into five standout Christmas Eve nail designs that are trendy, wearable, and tailored for all skill levels. From classic glitter to candy cane stripes, each design includes color palettes, tools, and step-by-step tips so you can recreate a polished manicure in one weekend.
What you’ll gain from these ideas:
– A mix of sparkly, matte, and patterned nails that photograph beautifully for holiday cards.
– Practical tips to simplify nail art, including when to use tape, dotting tools, and stamping plates.
– Quick maintenance hacks to keep your Christmas Eve nails crisp through the celebration.
Grab a cup of cocoa, gather a few nail tools, and let’s get festive with five show-stopping designs.
Design 1: Classic Glitter

Glitter nails never go out of style for Christmas, and a classic glitter gradient or full-coverage manicure feels both glamorous and timeless.
What you’ll need
– A sheer nude or blush base coat
– Red, gold, or emerald glitter top coats (mixed sizes look best)
– A good clear top coat
– Nail art sponge (for gradient application)
– Base coat and top coat
How to do it
– Prep: Shape nails, push back cuticles, and buff the nail surface lightly.
– Base: Apply a thin base coat to protect the nail, then let it dry.
– Glitter application: For a gradient, dab the sponge into the glitter polish and press onto the tip, blending toward the middle. For full-glitter, paint a thick coat from cuticle to tip.
– Layer: Add 1–2 more sheer coats if you want richer sparkle, allowing each layer to dry.
– Seal: Finish with a generous top coat to smooth out the glitter and extend wear.
– Curing: If you’re using gel, cure each layer under an LED lamp as directed by the product.
Design notes and tips
– Why it works for Christmas Eve: Glitter nails evoke holiday sparkle without competing with your outfit. They photograph beautifully in photos and catch light in dim party settings.
– Pro tips: Use a makeup sponge to apply glitter for a smooth, gradient look. For easier removal, seal glitter with a thick top coat to minimize shedding during removal.
Potential variations
– Silver and gold mix for a champagne-glitter vibe
– Red glitter over a nude base for a classic holiday look
– Matte top coat over the glitter for a modern twist
Design 2: Red and Green Plaid

Plaid nails are bold, chic, and quintessentially Christmas. A red and green plaid on a neutral base feels sophisticated rather than childish.
What you’ll need
– Nude, white, or pale pink base color
– Red and green nail polishes (or gel colors)
– Striping brushes or striping tape
– Thin precision brush for plaid lines
– Top coat
How to do it
– Base: Paint nails with your chosen base color and let dry completely.
– Create vertical lines: Use a thin brush or striping tape to lay down vertical green lines at even intervals.
– Add horizontal lines: Apply red horizontal lines crossing the green lines to form a plaid pattern. Use tape if needed to keep edges crisp.
– Intersections: Add tiny white or beige lines at the intersections for depth (optional).
– Seal: Allow the lines to dry, then finish with a top coat for a long-lasting look.
Design notes and tips
– Why it works for Christmas Eve: Plaid nails feel festive and fashion-forward, especially when you pair them with a minimalist outfit or a red velvet dress.
– Pro tips: Double up on the tape to avoid smudging. If you don’t have a striping brush, you can use a toothpick or a nail art dotter for precise lines.
Variations
– One accent nail with a large plaid pattern, while the rest are solid red or nude
– Add a subtle gold foil line for a luxe touch
Design 3: Snowy White with Snowflakes

Snowflakes on a white background give a wintry, elegant look that’s perfect for a Christmas Eve party or a cozy night in.
What you’ll need
– White nail polish (or white gel)
– Light blue or silver for snowflakes
– Snowflake stamping plate or fine detail brush
– Clear glitter (optional)
– Silver or iridescent rhinestones (optional)
– Top coat
How to do it
– Base: Paint nails white and let them dry completely.
– Snowflakes: Use a stamping plate with snowflake designs or hand-paint delicate snowflakes with a fine brush. Aim for 1–2 nails per hand as an accent.
– Subtle sparkle: Add a light dusting of clear or iridescent glitter on the tips or over the entire nail for a frosted effect.
– Rhinestones (optional): Place a small rhinestone at the base of one nail for a touch of glamour.
– Seal: Finish with a top coat to protect the snowflakes.
Design notes and tips
– Why it works for Christmas Eve: Snowflake nails scream winter romance and holiday spirit without overpowering your outfit.
– Pro tips: If stamping, wipe the plate between uses to maintain clean lines. For hand-painted snowflakes, practice a few quick petals on a sheet before applying to nails.
Variations
– Snowflakes in blue or silver over navy nails for a cool-toned take
– Matte white base with glossy snowflakes for contrast
Design 4: Velvet Green Finish
Velvet nails give a luxe, cozy vibe that’s ideal for a Christmas Eve evening. This look uses a deep emerald or forest green and a velvet effect.
What you’ll need
– Deep emerald or forest green nail polish
– Velvet powder or flocking powder (nail-friendly)
– Clear nail adhesive or clear top coat (to help the velvet powder adhere)
– Optional: gold foil accents for a festive touch
How to do it
– Base: Apply a base coat and two coats of deep green polish. Let it dry to a tacky finish for velvet application.
– Velvet application: Dab velvet powder onto the tacky surface using a soft brush or your fingertip. Gently press to ensure even coverage.
– Clean-up: Brush away excess velvet powder with a soft brush.
– Accent (optional): Lightly press gold foil flakes or foil strips on one or two nails for a luxe contrast.
– Top coat: Avoid a glossy top coat unless you want a slight sheen; if you want maximum velvet, skip the top coat or use a matte finish.
Design notes and tips
– Why it works for Christmas Eve: Velvet nails feel plush and festive, echoing holiday textures like velvet dresses and blankets.
– Pro tips: Velvet nails can wear longer as they tend to chip less visibly, but avoid water exposure in the first 24 hours to ensure the powder adheres well.
Variations
– Use metallic green for a bold effect
– Pair with a single glitter accent nail to keep the look modern
Design 5: Candy Cane Stripes
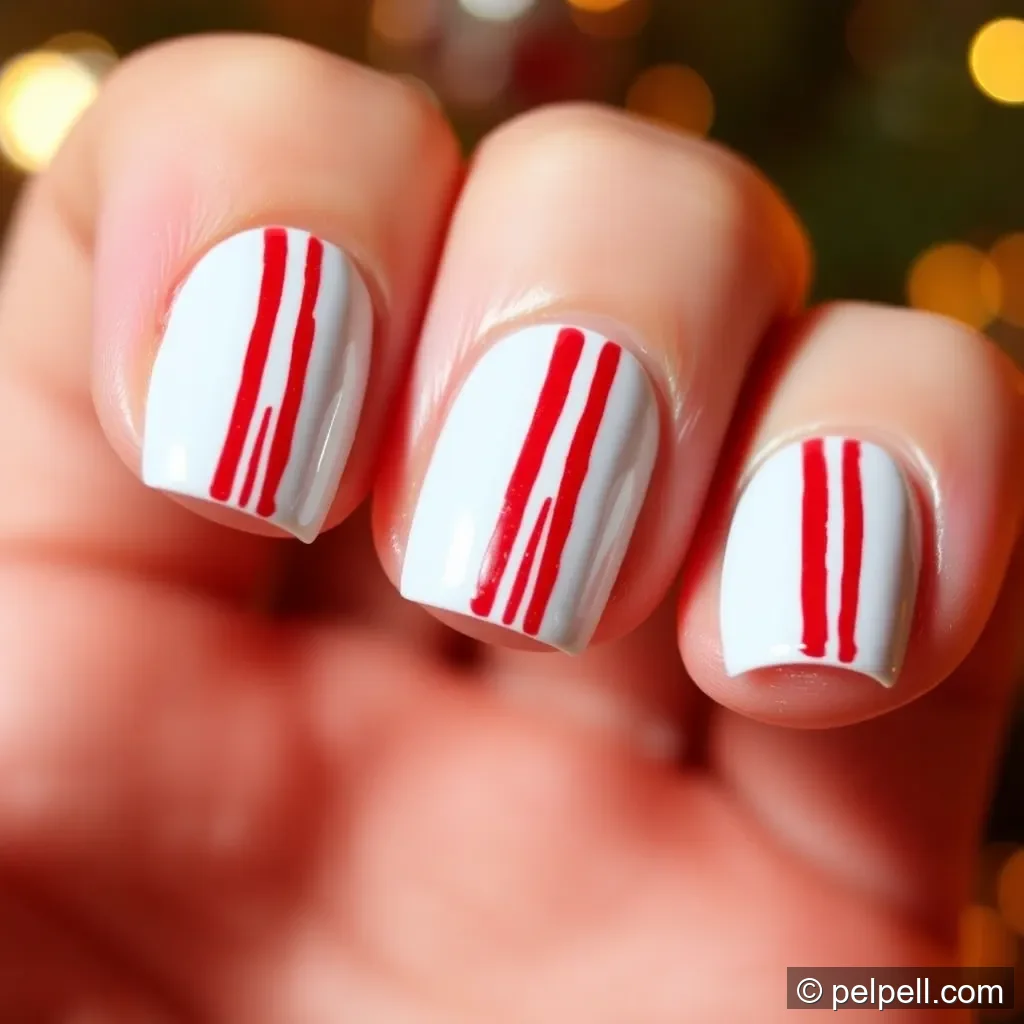
Candy cane nails are playful, modern, and instantly holiday-ready. Red and white stripes on each nail are cheerful and chic.
What you’ll need
– White nail polish
– Red nail polish
– Striping brush or thin brush
– Tape (optional)
– Top coat
How to do it
– Base: Paint nails white and let dry completely.
– Create stripes: Use a striping brush to paint vertical or diagonal red stripes. You can also do horizontal stripes with tape for crisp edges.
– Clean lines: If you’re using tape, remove it while the red polish is still slightly tacky to prevent pulling.
– Accent nails: Do a single accent nail with a diagonal red stripe or a small red bow using a fine brush.
– Seal: Apply a top coat to lock in the design and add shine.
Design notes and tips
– Why it works for Christmas Eve: Candy cane stripes are instantly recognizable as Christmas-inspired and pair well with red, white, and metallic accessories.
– Pro tips: For precise stripes, use thin striping tape to guide your lines. If you make a mistake, a small brush dipped in nail polish remover can clean up the edges.
Variations
– Replace white with pale pink for a softer look
– Add a thin gold line down the center of the red stripe for a luxe twist
Conclusion
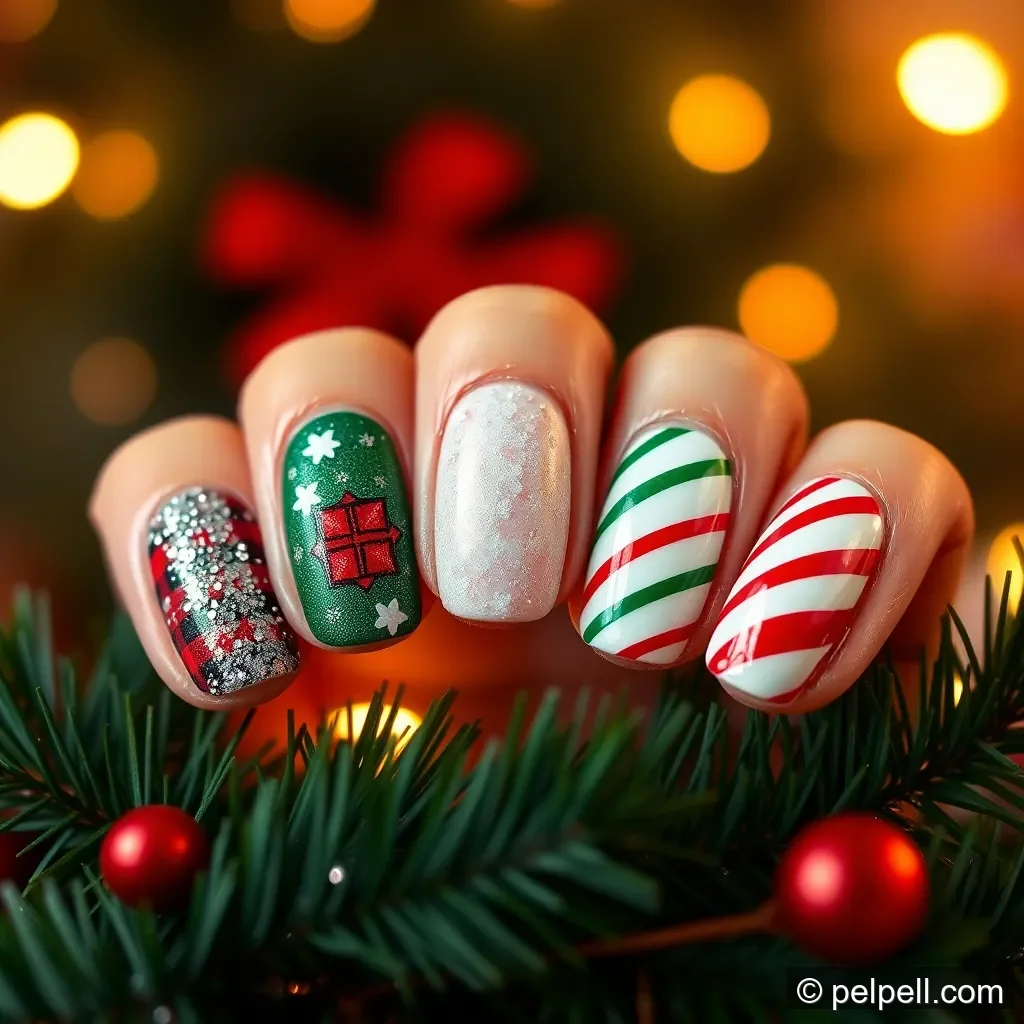
Five Christmas Eve nail ideas—classic glitter, red and green plaid, snowy white with snowflakes, velvet green, and candy cane stripes—offer a spectrum of moods from glam to cozy to playful. Whether you’re hosting a festive dinner, attending a carol service, or curling up by the fireplace, these designs are designed to stay vibrant through the night and photograph beautifully in holiday lighting.
Ready to try these at home? Start with the design that best fits your outfit, gather a small checklist of tools, and treat your nails as the final, fabulous accessory of your Christmas Eve look. If you give any of these designs a go, I’d love to see your photos—tag us or drop a comment with your color choices and techniques. Happy holidays, and may your nails be as merry as your celebrations.