Countdown to Christmas Eve with nails that shine as bright as holiday lights. Whether you’re curling up by the tree, attending a cozy family dinner, or posing for festive photos, the right manicure can elevate your whole look. In this guide, you’ll discover five show-stopping nail designs that are both gorgeous and doable at home. From glittering red to velvet berry, these ideas pair classic Christmas colors with modern details so your hands look flawless in every selfie and candlelit moment.
Glimmering Red and Gold Foil Tips

This design is all about glossy drama. A deep red base paired with coppery-gold foil accents creates a luxe look that photographs beautifully under warm holiday lighting. It nods to traditional Christmas color schemes while staying contemporary and chic.

- Base coat
- Serious red nail polish (creme finish works best)
- Gold foil sheets or gold foil tape
- Sponge for gradient (optional)
- Top coat (glossy)
- Fine nail art brush or striping tape
- Prep nails: shape, buff, and push back cuticles. Apply a clean base coat and let it dry.
- Apply two coats of red polish, allowing each coat to dry fully.
- Cut small pieces of gold foil. Press them gently onto the tips using a fine brush or tweezers to create a foil French tip.
- Seal with a generous layer of top coat to smooth foil edges and prevent snagging.
- Optionally add a light gradient at the cuticle using a small amount of red on a sponge for depth, then re-seal with top coat.
Snowy White with Crystal Snowflakes

Clean, crisp, and irresistibly wintry, this look mimics freshly fallen snow. A white base with delicate snowflake decals or tiny crystal accents makes for a camera-ready manicure that still feels minimalist and elegant.

- Snow-white or sheer white polish
- Flat dotting tool or toothpick
- Tiny crystal rhinestones or nail decals
- Top coat with good leveling power
- Stripes or stencil tape for clean tips (optional)
- Prep nails and apply base coat. Let dry completely.
- Paint two coats of white polish for a solid base; finish with a quick-dry top coat.
- Use a fine brush or decal to place snowflake motifs on one or two accent nails. Add a few tiny rhinestones for extra sparkle.
- Seal with top coat, ensuring the snowflakes are fully set and the rhinestones are secure.
A frosted Matte top coat can soften the look for a more wintery vibe if you’re not into high shine.
Evergreen Elegance with Gold Ornaments
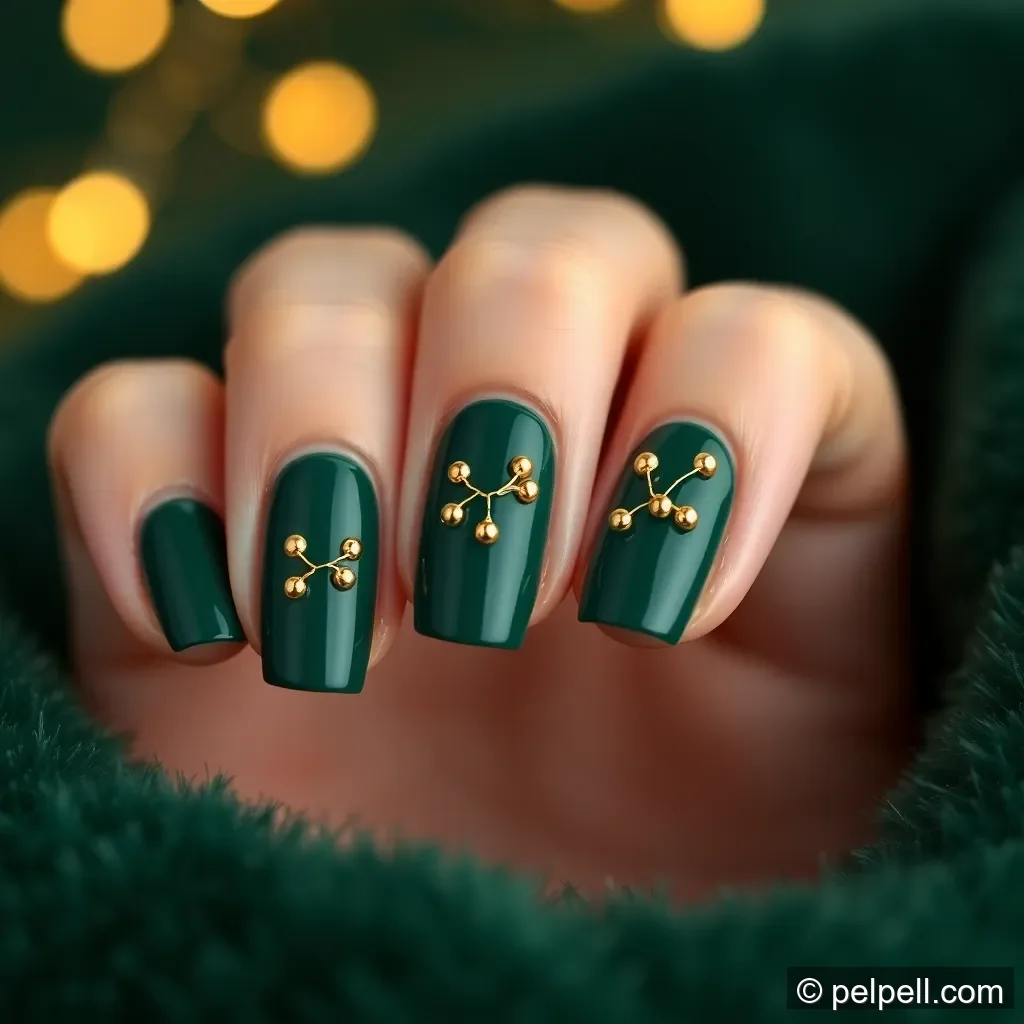
Deep forest green nails with minimalist gold dot ornaments evoke tree garlands and holiday whimsy. This design is festive without being loud, and it pairs beautifully with velvet outfits and gold jewelry.

- Dark green polish (creme or satin finish)
- Gold nail art paint or metallic polish
- Dotting tool and a fine brush
- Top coat
- Shape nails and apply base coat. Let dry.
- Apply two coats of green polish; allow to dry between coats.
- Using a dotting tool, create small gold dots in varying patterns on accent nails to mimic ornaments, or place tiny gold sticker ornaments if you prefer.
- Finish with a glossy top coat to lock in the design.
French Tips with a Festive Red Base
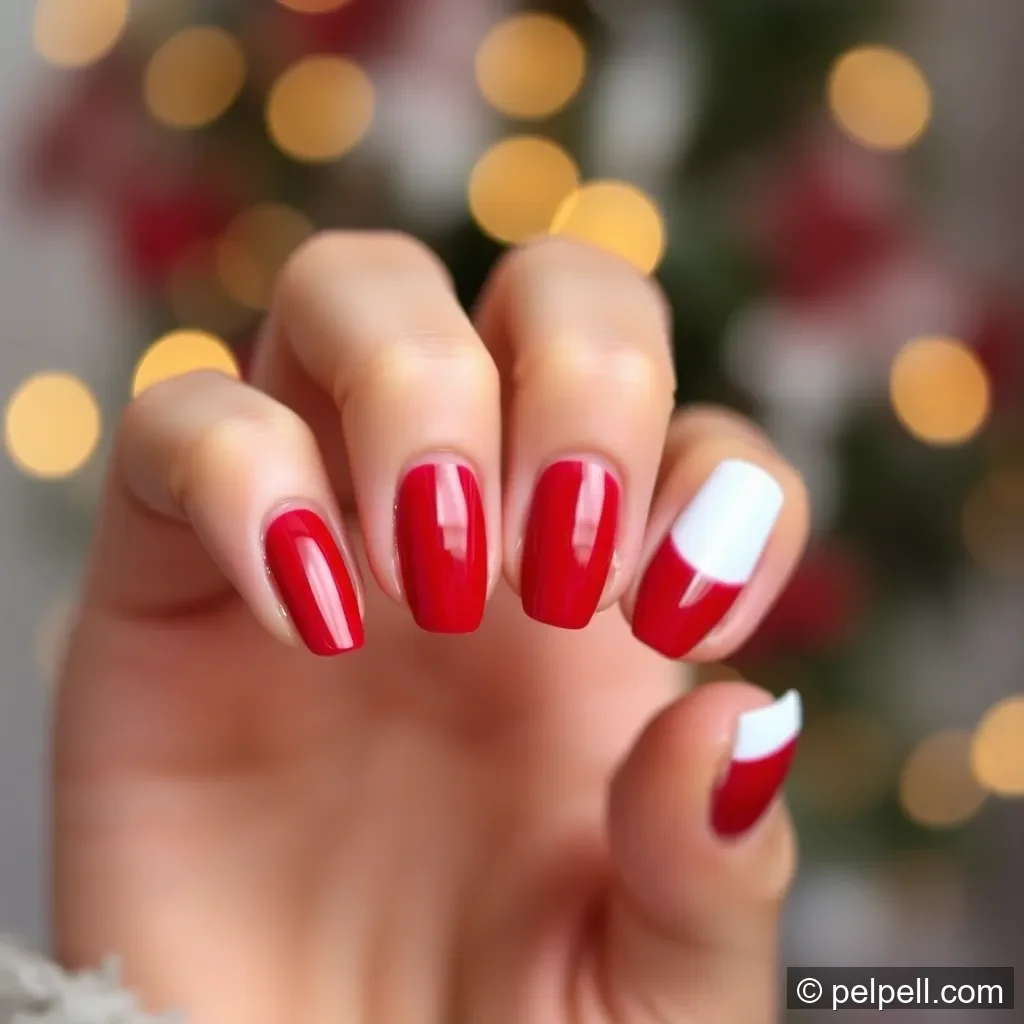
A modern twist on a classic, this look keeps the nail shape clean and timeless while the red base adds holiday drama. Perfect for those who love a chic, polished manicure with a party-ready edge.

- Red nail polish (creme or satin finish)
- White nail polish for tips or white nail art pen
- S-shaped nail guides or stencil tape
- Top coat
- Prep nails and apply base coat.
- Paint all nails with two coats of red polish; let dry.
- Seal tips with white polish using nail guides for a crisp line. If you don’t have guides, use a thin brush to paint a clean white edge.
- Finish with a high-gloss top coat to extend wear during holiday festivities.
Matte Berry Velvet with Tiny Stars
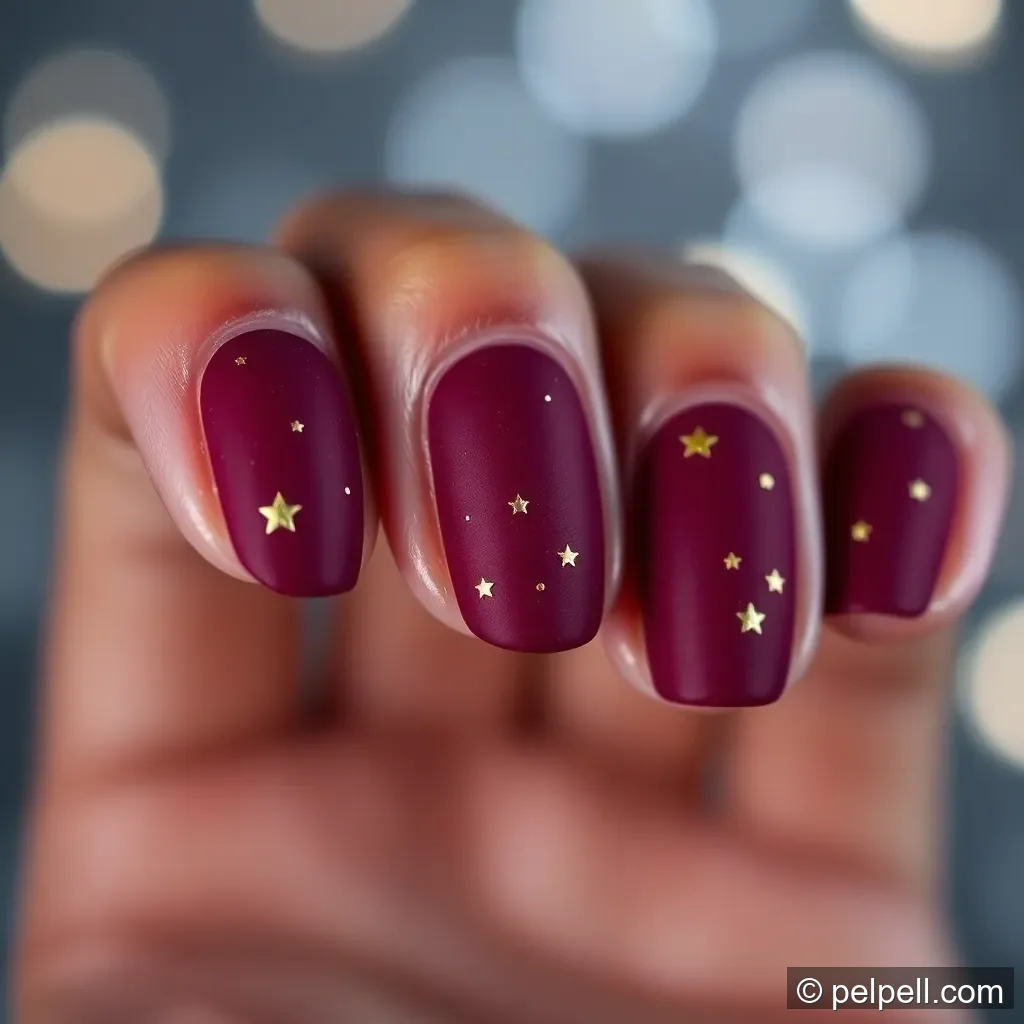
Dress up your nails with a luxurious matte berry shade, then sprinkle a few star accents for a night-sky-meets-ornament vibe. This look is fashion-forward for those who love a subtle, high-end finish.

- Deep berry polish (matte finish)
- Top coat (optional matte top coat)
- Star nail decals or tiny white/cream stars
- Fine brush for placement
- Shape nails and apply base coat. Let dry.
- Apply two coats of berry polish. Let dry to a matte finish (use matte top coat if your polish is shiny).
- Place small star decals on two accent nails or use a brush to paint tiny stars by hand.
- Seal with matte top coat or a thin layer of clear top coat if you prefer shine.
Wrapping it up: pick your festive finger fashion

Whether you crave classic red and gold or a chic, modern matte finish, these five designs give you reliable, high-impact options for Christmas Eve. The key is choosing a look that fits your outfit, your schedule, and your nail-care routine. For speedy results, you can combine elements across designs—foil tips on a red base or a snowy white accent on one ring finger—so your manicure feels fresh and personalized without becoming overwhelming.
If you’re trying these at home, share your results in the comments or tag us on social media with your photos. Happy holidays, and may your nails shine as bright as your holiday spirit.
Want to save this guide for later? Pin it to your festive nail board or bookmark this post for the next manicure session. For more holiday-inspired nail ideas, explore our seasonal manicure archives and stay tuned for upcoming tutorials, tool roundups, and pro tips from nail artists.