Ready to sparkle this holiday season? These five Christmas Eve nails are designed to be festive, stylish, and easy to recreate at home. Whether you love classic red, cozy greens, or dramatic midnight blues, there’s a look here for every mood and skill level. Christmas Eve nails aren’t just about looking good; they’re about creating a little moment of celebration on your fingertips.
From timeless red with a glittery accent to delicate snowflakes and candy-cane stripes, these ideas balance easy at-home application with professional-looking results. Read on to find your next manicure, and don’t forget to tailor colors to your skin tone and nail length for the best finish.
Classic Red with Gold Glitter Accent

A timeless holiday staple, this design pairs a rich red base with a glamorous gold glitter accent on a single nail. It’s chic, festive, and perfect for a Christmas Eve party or a cozy family dinner.
- You’ll need:
- Base coat
- Classic red nail polish (creamy finish)
- Gold glitter nail polish or gold foil sheets
- Top coat
- Optional: rhinestones or metallic nail tape for extra sparkle
- Nail art brush or liner brush for precision
- Steps:
- Prep nails: file, push back cuticles, and apply a base coat to protect the nails.
- Apply two coats of red polish on all nails except the accent nail.
- On the accent nail (usually the ring finger), apply a clear base and layer with gold glitter polish, or press on small gold foil pieces for a textured look.
- Seal with a glossy top coat to maximize shine and longevity.
- Optional: add a few rhinestones or a thin strip of metallic tape along the cuticle line for extra glam.
Pro tips: Let each layer dry fully to prevent smudging, and use a thin brush for precise glitter placement. If you prefer a subtler look, swap the glitter accent for a matte red with a single glossy top coat on the accent nail.
Emerald Green with Snowflake Accent

Channel a winter wonderland with a rich emerald base and delicate white snowflakes. This design feels festive yet elegant, ideal for guests who love a touch of whimsy without over-the-top sparkle.
- You’ll need:
- Base coat
- Emerald green nail polish
- White nail art polish or acrylic paint
- Snowflake decals or a fine dotting tool
- Top coat
- Optional: fine nail art brush for DIY snowflakes
- Steps:
- Prep nails and apply base coat.
- Paint all nails with two even coats of emerald green.
- On one or two nails, draw tiny white snowflakes or apply snowflake decals. If drawing, start with a small dot in the center and add lines to create the flake pattern.
- Finish with a clear top coat to protect the snowflakes and add shine.
Tip: Use a striper brush or a very fine nail art brush for crisp snowflake lines. For a softer look, pair the snowflakes with a matte top coat instead of gloss.
Gold Foil on Matte Berry
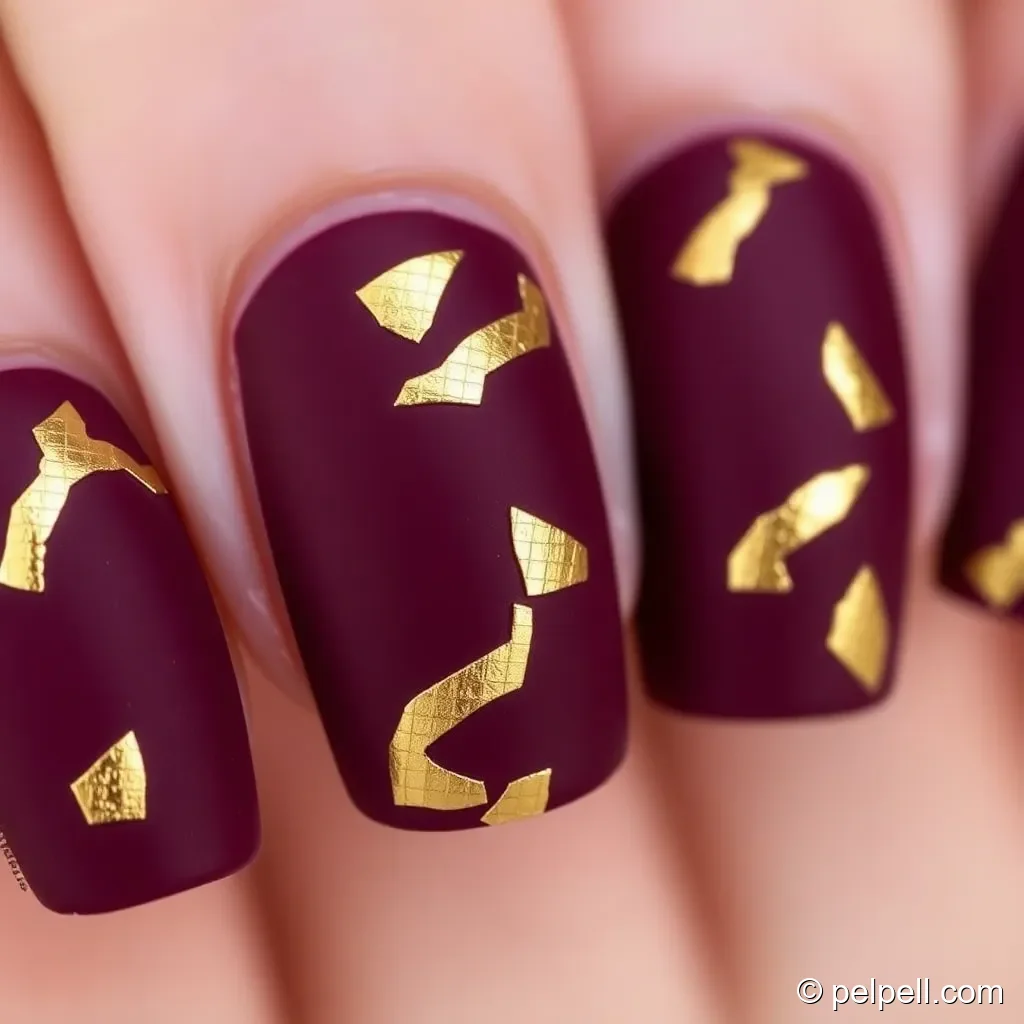
Deep berry nails with metallic gold foil deliver a luxe, salon-worthy finish that’s perfectly on-trend for holiday parties. The matte berry base contrasts beautifully with the shine of the foil scraps.
- You’ll need:
- Berry-nail polish (creamy or satin finish)
- Gold foil sheets or a gold foil nail polish
- Top coat (glossy or matte, depending on your preference)
- Base coat
- Slim tweezers or foil pickup tool
- Steps:
- Apply base coat and two coats of berry polish to all nails.
- When the berry paint is slightly tacky, gently press small pieces of gold foil onto the nails using tweezers, creating an abstract foil pattern.
- Seal with a top coat. If you want a modern, velvety look, choose a matte top coat.
What to know: Gold foil looks best when you don’t cover every inch of the nail—randomly placed pieces create a more dynamic, holiday-inspired effect.
Candy Cane Stripes with Sparkle Tips
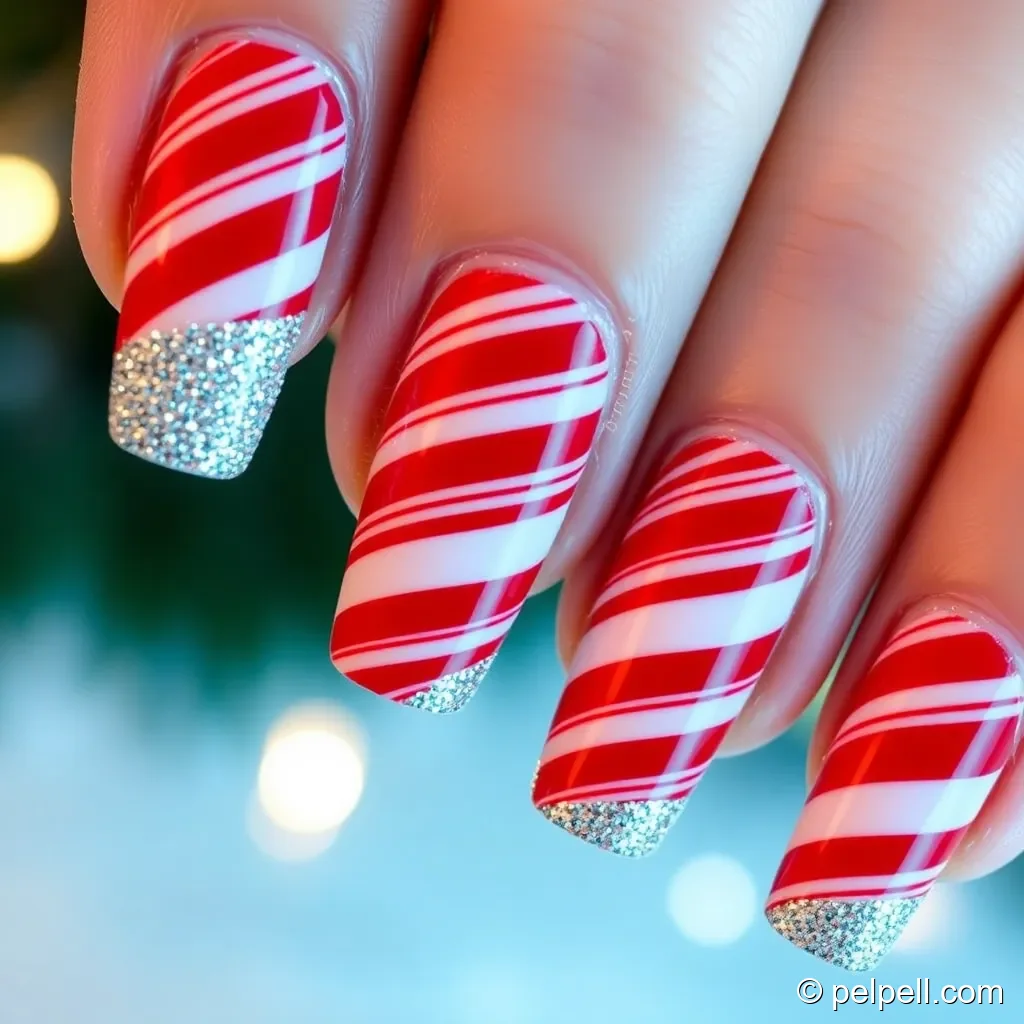
For a playful nod to the season, try candy cane stripes paired with sparkling tips. Red and white stripes evoke peppermint twists, while twinkling tips add a festive finish.
- You’ll need:
- Red and white nail polishes (creamy finishes work best)
- Striping brush or narrow nail art brush
- Top coat
- Optional: striping tape for crisp lines
- Steps:
- Base: apply a clear base and two coats of your chosen color on each nail.
- Floor the stripes: use a striping brush to paint clean red and white candy cane lines on selected nails or create an entire accent nail with diagonal stripes.
- Add sparkle: finish the tips with a thin layer of glitter top coat for a festive shimmer.
- Top coat: seal everything in with a durable top coat.
Creative tip: If you’re new to striping, practice on a sheet of paper first. A steady hand and a damp brush help you achieve neat, even stripes.
Winter Night Sky: Navy with Silver Stars

Dip into a dreamy wintry look with a deep navy or black base and scattered silver stars or flecks. This look is dramatic, modern, and incredibly photogenic for holiday gatherings.
- You’ll need:
- Base coat
- Midnight blue or deep navy polish
- Silver nail polish, glitter, or chrome powder
- Dotting tool or star nail decals
- Top coat
- Steps:
- Apply the base coat and two coats of navy polish on all nails.
- On one or two nails, create starry accents using a dotting tool or apply small star decals. You can also dust a light layer of silver glitter around the stars for a subtle glow.
- Finish with a glossy top coat to lock in the shimmer.
Optional twist: Add a tiny gradient near the tips by brushing a touch of silver glitter toward the edge of the nail for a subtle aurora effect.
Conclusion

With these five designs, you can switch up your Christmas Eve nails to suit the mood, time, and level of effort you want. Whether you prefer a classic red, a lush green, or a moody navy with starry accents, there’s a festive manicure here that you can recreate at home in under an hour. Experiment with finishes—glossy, matte, or a mix—and tailor each look to your nail length and personal style.
If you try one of these ideas, share your outcome in the comments or tag us on social media. For more holiday nail inspiration, tips on at-home manicures, and product recommendations, subscribe to updates and stay tuned for a new round of festive tutorials.